How the products are made
I have allied with a couple of talented guys from Latvia who have known each other since school.
They have a small company with two extra people employed, and they make our own wooden products from scratch in their small workshop - from local oak from Latvia and Lithuania in particular. They produce both their own designs and mine.
This also means that they themselves help ensure the quality of all watch dials.

Genuine handwork
The process of manufacturing PureTime's products involves both manual and machine work.
50% of the work time is done mechanically with a CNC router that cuts the product out of the solid wood. The other half of the work is handwork, where sanding, painting, sanding, waxing and polishing are done. Where the details are taken care of - below, all examples are shown for one of the dials for a wall clock, but the process is the same for all products.

CNC milling versus laser cutting
CNC milling is the most common method when working with solid wood. Other wood carvings are typically made with laser cutting.
- Laser cutting is ideal for working with very detailed and fine patterns, where the thin laser beam can work very precisely.
- Conversely, a laser cannot cut very deeply into wood - and since it burns away the wood, there will always be a slight discoloration at the edges of the pattern.
- A CNC router cannot cut as detailed as a laser, as it uses a drill to mill out the wood. On the other hand, CNC can work in very deep materials - and it is also possible to make some really nice milling and engravings with depth.
The process of manufacturing the products
There are a lot of smaller steps you have to go through to get the perfect product, but I will try to describe it in outline.
1. Milling out the basic design itself
First, the wooden design itself is milled out - including the details that need to be carved.
After this, no further cutting is done in the product, as all cutting must be done before the product is waxed/oiled and sanded.

2. Cleaning after milling
The product is coarsely sanded/cleaned to remove coarse residue, splinters and sawdust so that it is ready for the next treatment.

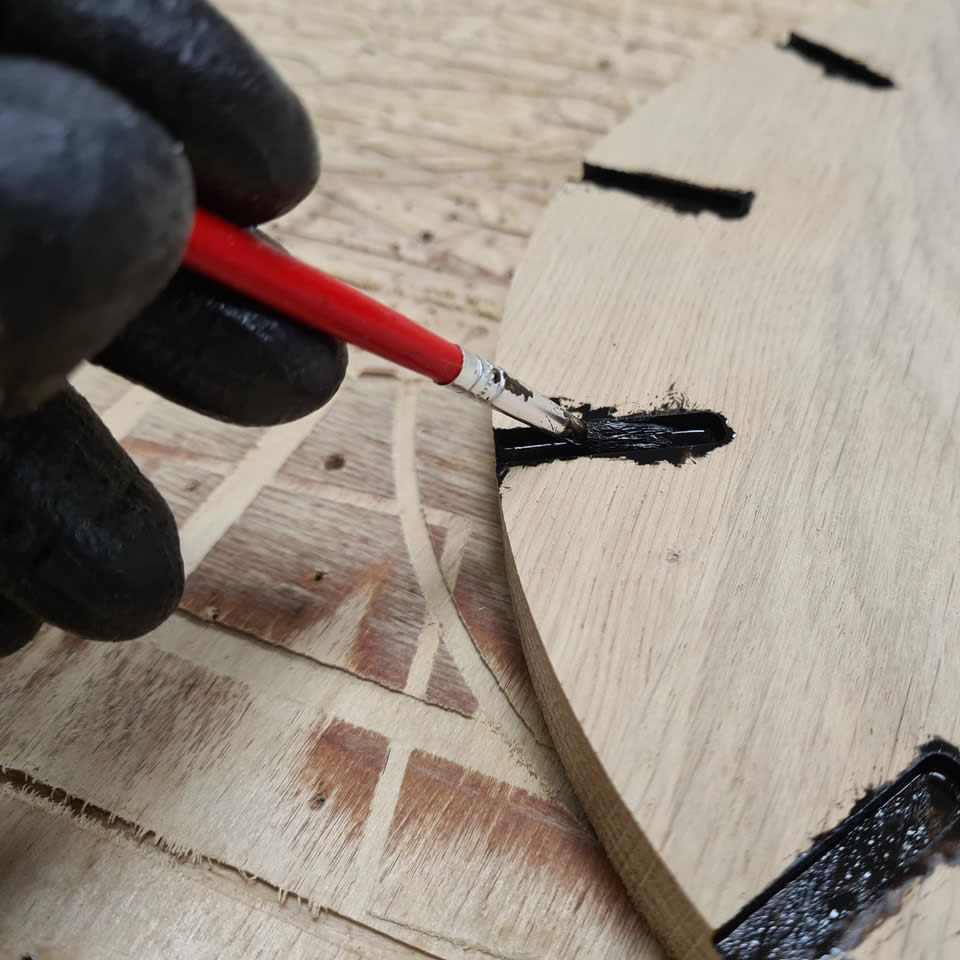
3. First waxing with color-pigmented wax oil
If parts of the product need to have a different color than the natural oak color, this is done in this step. Typically, these can be carvings, engravings or other parts that need to have a different color shade.
After 10 minutes, remove any excess wax residue before allowing it to dry.
4. Sanding again
Now it's time for another sanding to remove the dry wax residue left after the first treatment of the product.
At the same time, it is also here that the fine-tuning of the rest of the product takes place.

5. Final oiling and polishing
Now a transparent wax oil is applied, which completes the treatment of the product and also protects against moisture.
If the product only consists of one color shade (e.g. natural color), then this is the only oiling that is done, as color pigment can be mixed into the oil, so that the whole thing can be done in one work step in terms of color.
Finally, the product is polished to ensure a perfect finish.
If there are details - such as on the meeting room sign - they are done last.

Order preparation
When I receive an order, the product is packaged securely and usually shipped the next business day.